Learning to Make Pizza — From a Product Manager’s Perspective
We ordered pizza dough one day, but they didn't have any, so I decided I'd make some. How hard could it be?
As a product person, I'm obsessed with the MVP — the process of experimentation, iteration, and gradual improvement. For some, this feels like a natural way to work; for others, it may require some adjustment. In my case, I think it's baked into my personality (pun intended). It's how I've always done things, like learning to ski and becoming a Ski Patroller in six months. I was also pretty unconventional about how I learned to sail, weld, sing, or start a new career. And now I've applied the MVP method to make homemade pizza.
I cook and bake quite a lot for my family and other people, but I had only really made pizza if it was with pre-made dough. At the start of the pandemic, we tightened our belts. We were trying to limit our expenses, so ordering out (although we didn't do that much pre-pandemic) was something we cut back even further due to the economic uncertainty.
It wasn't long before I decided we should start making our own pizza. I didn't have time to make pizza dough myself, so I started by ordering pre-made dough from the grocery store every week, and we would make pizza every Friday. We ordered pizza dough one day, but they didn't have any, so I decided to make some. How hard could it be? It was pretty straightforward, but my family would have told me to stop making pizza before too long if I hadn't taken an iterative approach. Now, it's our preferred option and one we'd choose over take-out any day.
Pizza MVP
The true MVP, in my case, was pre-made pizza dough. I took something off the shelf and made it fit my requirements. I added my toppings, put it in the oven, and called it a day. Once I had a handle on that process, making pizza dough was the next step.
Pizza Dough MVP
We had pizza, but pizza dough was a new product, and we had yet to 'roll' our own. So, I found a basic recipe with a good ratio of the necessary ingredients. I followed the directions (I thought), and we ended up with a pizza resembling a cracker. We didn't have a pizza; we had a cracker with pizza toppings.
Review the Data, Gather Feedback, Learn
What went wrong? Why was the pizza crust so thin and crunchy and not fluffy like we thought it would be? I reviewed the process, gathered feedback on the difference in the quality and realized I needed to include a critical step. I was using traditional yeast and not instant yeast, so I needed to allow the yeast more time to activate.
Pizza Dough V1
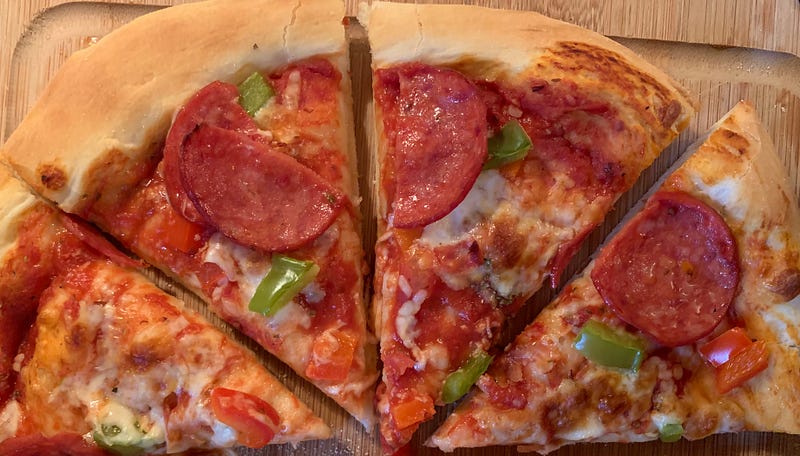
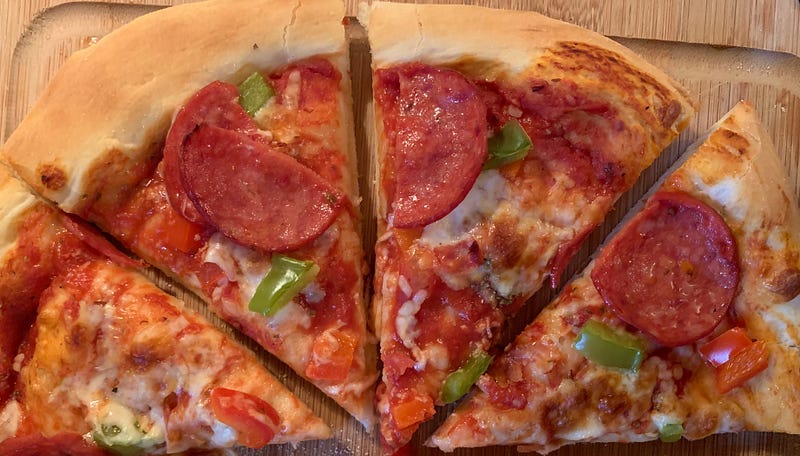
I made the pizza dough again, letting the yeast activate, and this time, it turned out significantly better. Now, we had a viable product, and I could start making more minor adjustments to get to the right end goal. I knew what I wanted — a thick outer crust and a firm bottom crust so that my pizza wouldn't go soggy or droop. This version was almost there. I just needed to continue making improvements.
Testing and User Feedback
I started making changes and testing the results. I still needed to get to 'product-market fit.' I was making pizza, but it needed to hit the mark and kept leaving something to be desired. My users weren't much help either; they all said it tasted good. They seemed happy with it, but they weren't at the point where they couldn't stop themselves from eating it. None of the kids were bringing over their friends to eat it. User actions weren't matching up with the feedback. I hadn't triggered the infamous flywheel I was hoping for.
Iterate Again and Again
I made the pizza dough every Friday for six months, making minor adjustments along the way. I adjusted the number of toppings I added and the cooking temperature and cook time. After getting those dialled in, I changed the dough-making process more. I still needed to knead the dough longer, and after some more research, I learned that a longer kneading time and double-proofing of the dough might lead to better results. I went from rolling the dough because it was so firm to stretching it out over the backs of my hands with ease because I had finally activated the gluten enough to stretch it thin without it breaking.
Delight
Every product needs a delighter or a unique value proposition. The next step is to take this now incredible pizza dough and make it sing. Add some cheese and herbs to the pizza dough during the kneading process, brush some olive oil on the crust, experiment with fresher and unique toppings, and surprise and delight your hungry audience.
Expand
Now that I'm comfortable with the core product, modifying it and trying new things is much easier. Making pizza dough is second nature, and now I can make pita bread and bread rolls, too, using the same recipe and methods. I can even pan-fry and bake it; it's versatile.
Scale
I've since taken this process, from making three pizzas for my family to making a dozen pizzas for our kid's birthday party. By doing so, I've gotten additional feedback, had wildly different requirements regarding toppings, and learned much more about managing the processes around scaling up such a process.
Why?
Experimenting is how I learn best; it's how I'm most comfortable working and how I've achieved some fantastic results in my life and the products I've worked on. Every situation is unique, but a consistent process can produce a positive result in anything you do.
Pizza Dough Recipe
1 1/2 cups of Warm Water (under 110ºf)
2 1/4 tsp traditional yeast
1 tsp white sugar
4 cups of flour
1/3 cup of olive oil
1 tsp salt
Directions:
In a mixing bowl (I use an electric stand mixer with a dough hook attachment), combine warm water, yeast and sugar. Give a gentle stir, and let stand for 10 minutes to allow the yeast to activate.
After 10 minutes, the yeast should be bubbled and frothy on top. Add flour, olive oil, and salt. Turn the mixer on stir/low and run until ingredients are combined and no longer sticking to the sides of the mixer.
Mix on a low for 5 to 7 minutes until the dough is smooth and not sticky to the touch. Once mixing is complete, pull the dough off the hook and out of the mixing bowl into a ball and put it in a well-oiled bowl. Cover with saran wrap or a wet towel, and let sit until doubled in size (approximately 20 minutes).
Once the dough has doubled in size, cut into equal portions and form into balls (I find 3 equal-sized balls make roughly 3 13" pizzas). Put into a container (I use a Tupperware container with a lid) and let sit for another 10 or 20 minutes before forming into pizzas.
While the dough rises a second time, pre-heat oven or BBQ with a pizza stone on the middle rack to 650ºf; it takes some time to get up to temperature. You can adjust the temperature as needed but must change the cooking time appropriately.
Once the dough is ready, place a dough ball on a surface covered in cornmeal. Covert the top of the dough ball in cornmeal, and then work the pizza into shape. I use a modified version of Vito Iacopelli's method, as shown in his YouTube video here:
Once shaped, put the pizza on a cornmeal-covered peel/lifter and add sauce and toppings. Give the pizza peel a little side-to-side shake to ensure your pizza isn't sticking (if sticking, lift the edges and add more cornmeal), then move the pizza to your oven. Slowly slide off onto the pizza stone while shaking side to side and removing the pizza peel as you go.
Cook for approximately 6 to 7 minutes or until the crust is golden brown and the bottom is firm. Remove from oven and place on cooling rack for a few minutes before moving to cutting surface (this helps prevent the bottom from getting soggy).


